Now that you have joined the Amazon Affiliate program you are ready to start monetizing your post. You can add product links to new posts and old posts as well. If you have a few posts that get a lot of traffic, start adding links to these first. Here is how to add Amazon links to your blog posts.
Step 1. Use the Site Stripe feature to link to text
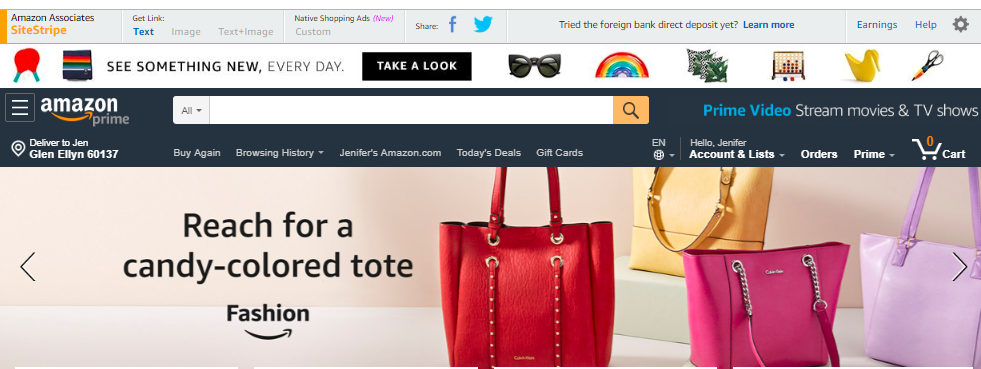
At the top of every Amazon page you will see the Amazon Associates Site Stripe bar. Start by searching for the product that you want to advertise. You can stay on the page that shows all the items in your search and direct readers to this page. The benefit of referring customers to the list of items is that they can scroll and click on the particular items that interest them. This would be worthwhile if you are linking to text like “boys superhero costumes”, “aquarium castles” or “Champion sweatshirts for men”. If you want to link to a specific product in your post, you click onto the item in Amazon and go to that particular product page.
Using the site stripe feature is easy. Click on the word “text” on the left side of the Site Stripe box. When the code is shown, simply copy the code, highlight the text in your blog post, click the add link word or icon on your site and paste in the code.
Step 2. Using Amazon Publisher Studio
Log in to your Amazon Associates account and at the homepage click on “Tools” and then “Publisher Studio”. This feature is compatible with WordPress, Blogger and Typepad and makes adding links a mere 2 step process. Scroll down to the three boxes horizontally across the screen that say “JS Copy”, “Registered Instances” and “Create New Instance”. You will click on the last one and then type your blog’s URL address in the box.
Hit “Generate Code”then click the box “JS Code”. Highlight and copy the code. Paste this code in the footer section of your blog. (If you have a WordPress site you have the option of downloading the official Amazon Affiliate Plug-in by searching “Amazon Associates Link Builder”.) Simply highlight the text you want to link to and a search box will pop up. Select the link you want to use and you are done. Similarly, you can select a photo on your post to get the pop up box and again choose the link and you are done.
Step 3. Creating Native Ads
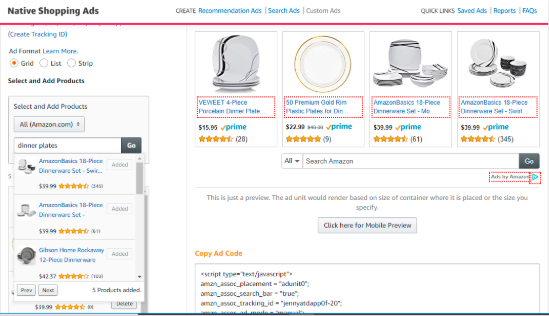
Log in to your Amazon Associates account. Click on “Product Linking” and then in the drop down box click “Native Shopping Ads”. You will have three choices listed across the header. You can choose Recommendation Ads, Search Ads and Custom Ads. For this tutorial I will teach you how to add Custom Ads that can be directly relevant to your article or site content. First click on Custom Ads, then click on “Create Custom Ads”. Scroll down just a little and on the left hand side, type your desired items in the search tab. This will bring up a selection of products and each time you click on the “add” button, it will be added to your blocks of ads. Your Native Ads will show four products in a row to entice readers to click and buy. You simply click “Copy Ad Code” then copy and paste into your blog post.
As you can see, it is easy to add Amazon links to your blog articles. Whether you use the Site Stripe feature, install and use Publisher Studio or integrate Native Ads, having clickable links for your readers to shop will easily make you an income. As stated before, start by adding links and ads to your previously published posts and then to your new articles as you publish them.
You might be interested in reading more blogging articles.
Pin this for later . . .