Paper Rose Tutorial
I am pretty unyielding when it comes to reuse, repurpose and waste not. That is one of the reason I love these roses so much. When we moved into our house, the previous owners left behind an incredibly large set of outdated encyclopedia-type books. We tried to donate them to a variety of places but even the overseas organizations did not want them. My husband (an environmental engineer) and I didn’t have the heart to toss them, so I am using what I can for my projects and art, and recycling the rest as I go along. This is where I am getting the paper for the roses for now. And one of the cool things about these roses is the fact that they do have print on them which makes them look cool on their own, but you also have the ability to paint them to your individual needs and liking. You can use spray paint for an even coat and color. You can hand paint using various shades and hues. AND, they are good for 1000 different projects!!!
Step 1.

Figure out your measurements
Read through Step 2 on how to do this.
You can use old book pages or newspaper, whatever.
You are going to need to experiment with a paper a few times (or more) to figure out your exact dimensions for the project you are going to do.
You will need to find the length that when rolled up into a flower, makes the size you want.
(the longer the paper the wider the rose) & ( the more sheets of paper the thicker the rose).

You also have to do and re-do and re-do your folds to figure out how tall/deep your roses will be and how thick each petal will be. Experiment by making your folds and then trying to roll it into a flower to make sure the thickness and height will work together.

Step 2.
Cut your paper.                                                I am using pages form the book so they are automatically 11 inches long. Then I am trimming the width to 7 inches. I chose to use three sheets of paper to get the thickness and look I want. So in groups of three, I cut enough
paper for as many roses as I want for my project. Figure out your flower dimensions from step 1, and calculate how many you will need for your project. (It is SO much easier to make them all at one than having to go back after and re-make more).


Step 3.
Fold and Roll

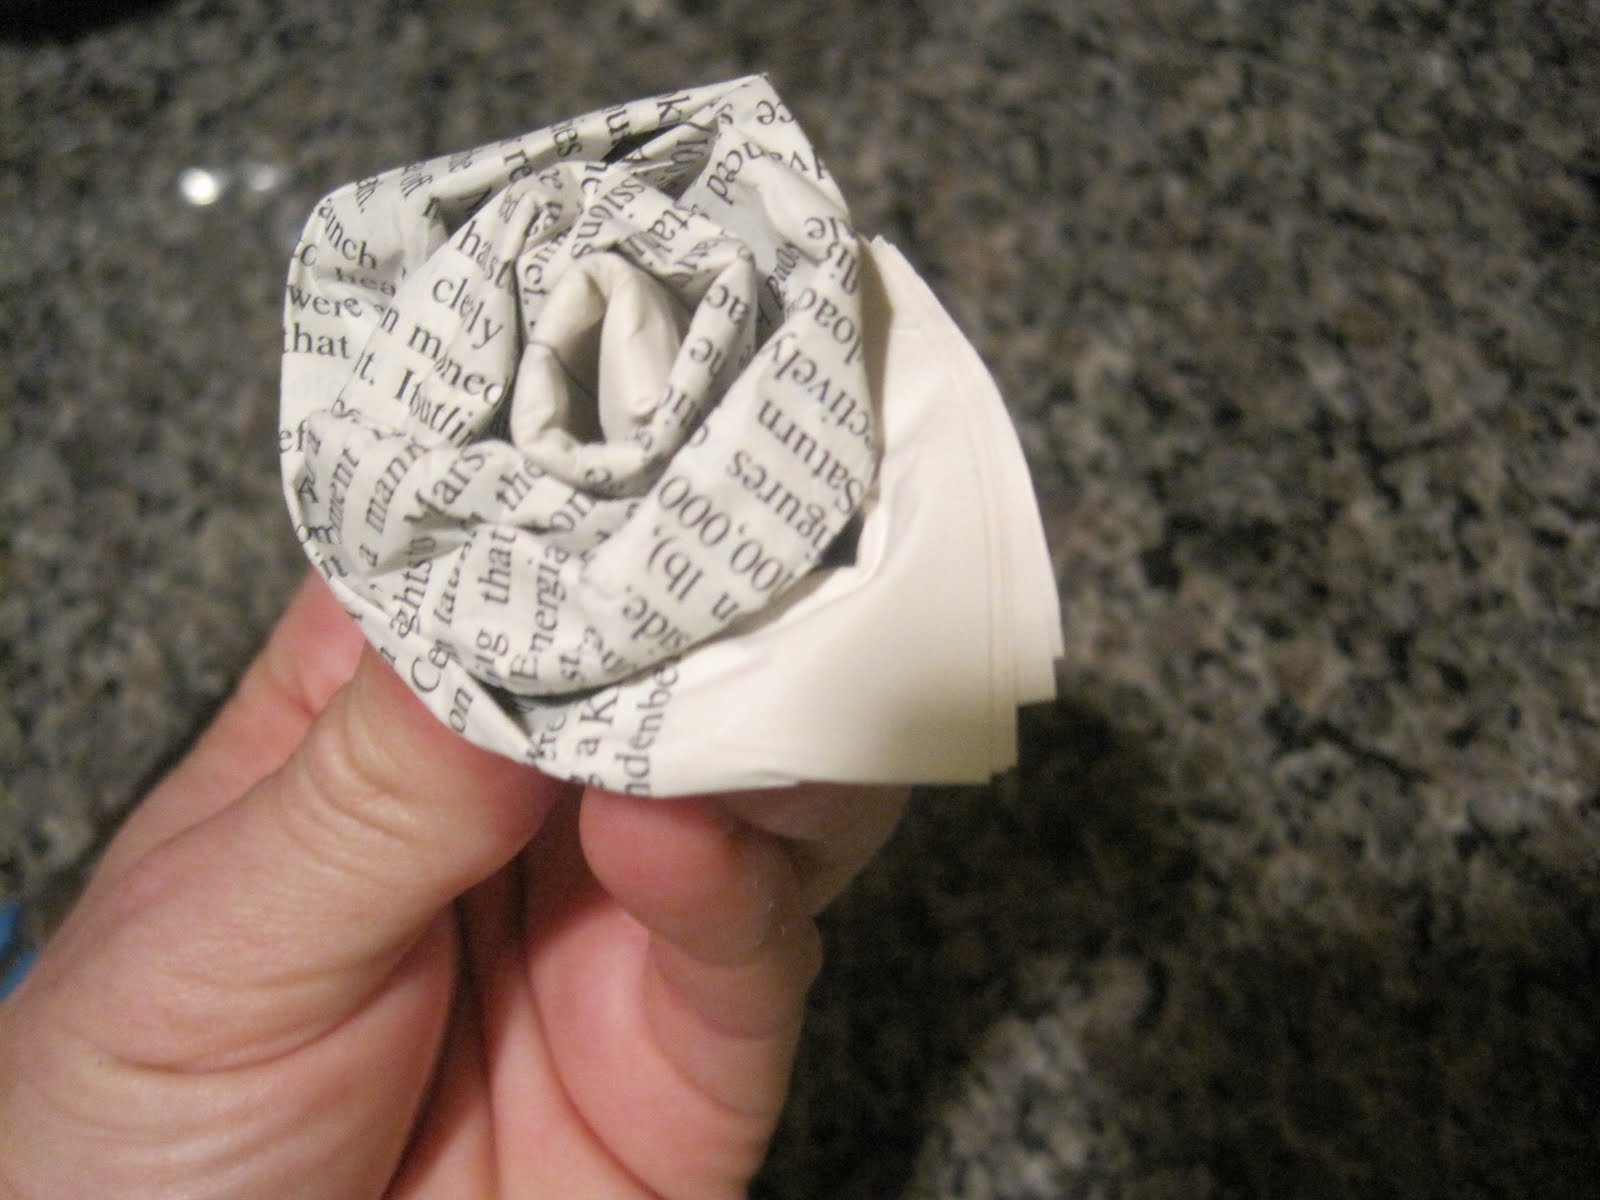
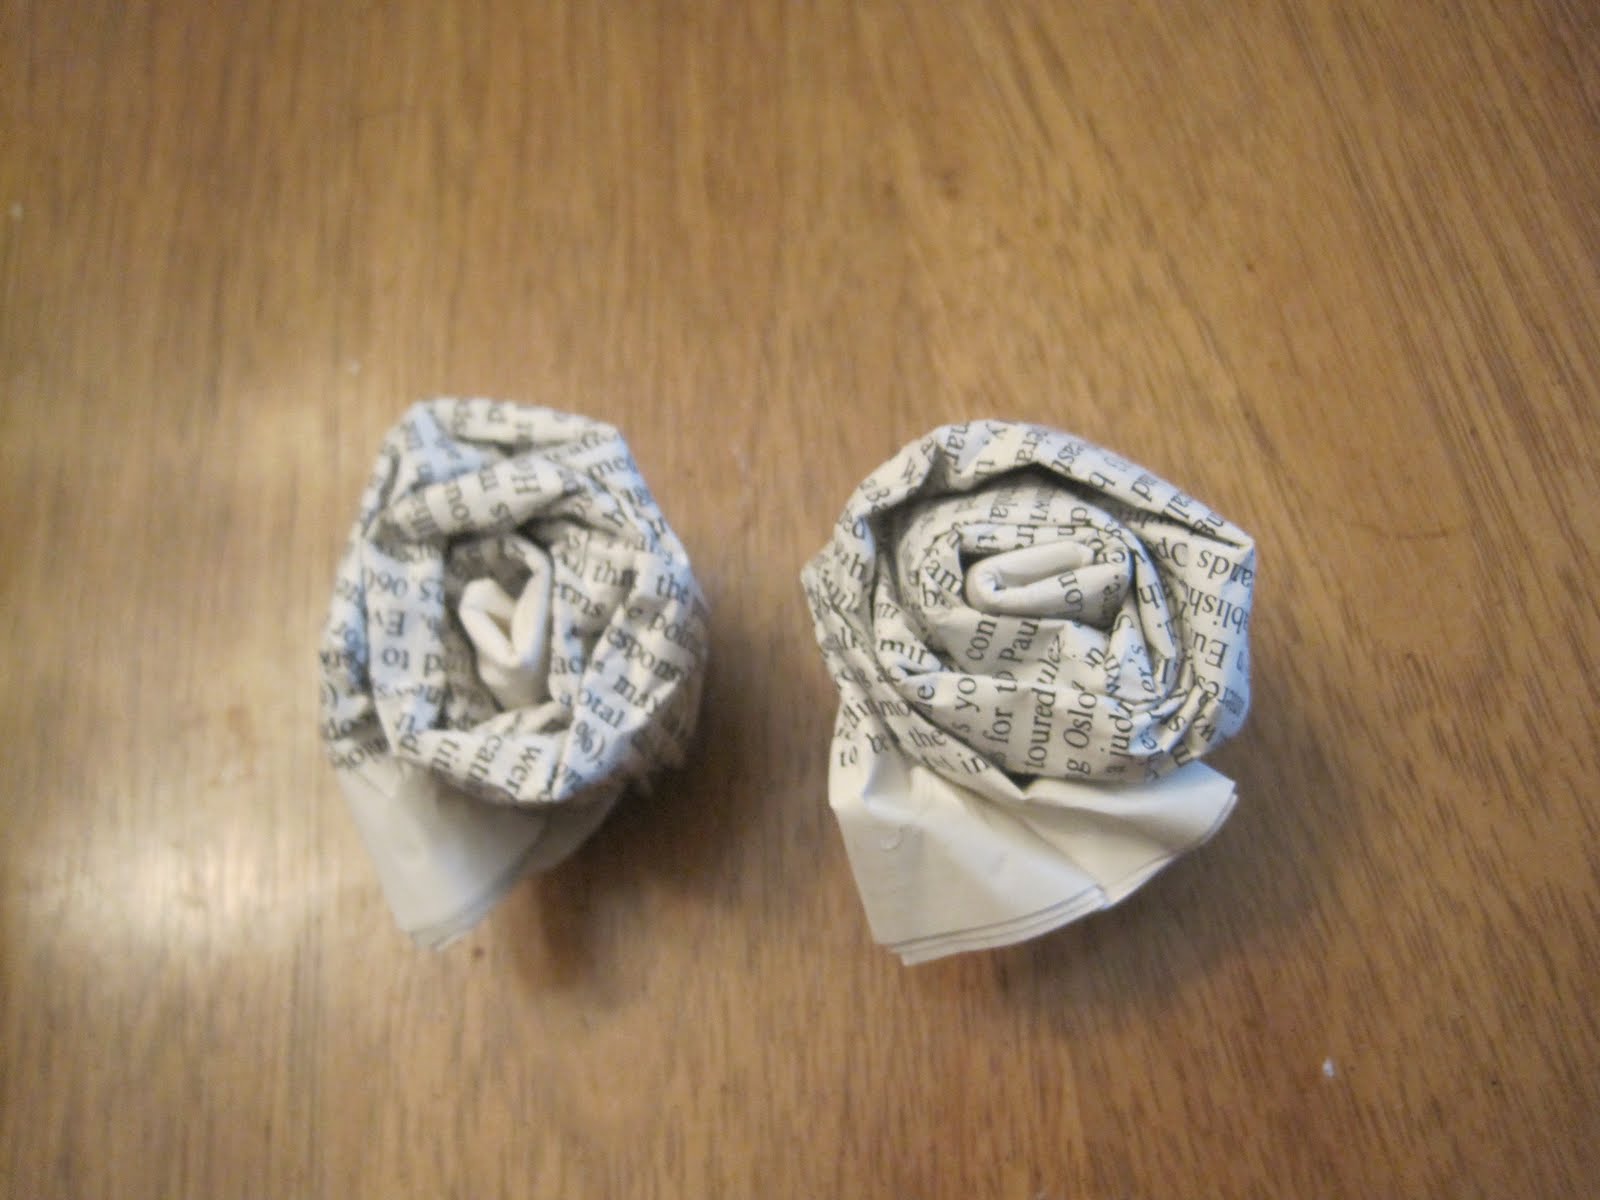
Now that you have a tidy and tall pile of paper next to you, let’s start to fold and roll them into roses! (I am a major multitask maniac…so a hint, this is a great no brainer part that you can save for a time when you are sitting outside watching the little ones do their own thing, after bedtime when you can hulu the show you missed, or talk on the phone, listen to your favorite music….)
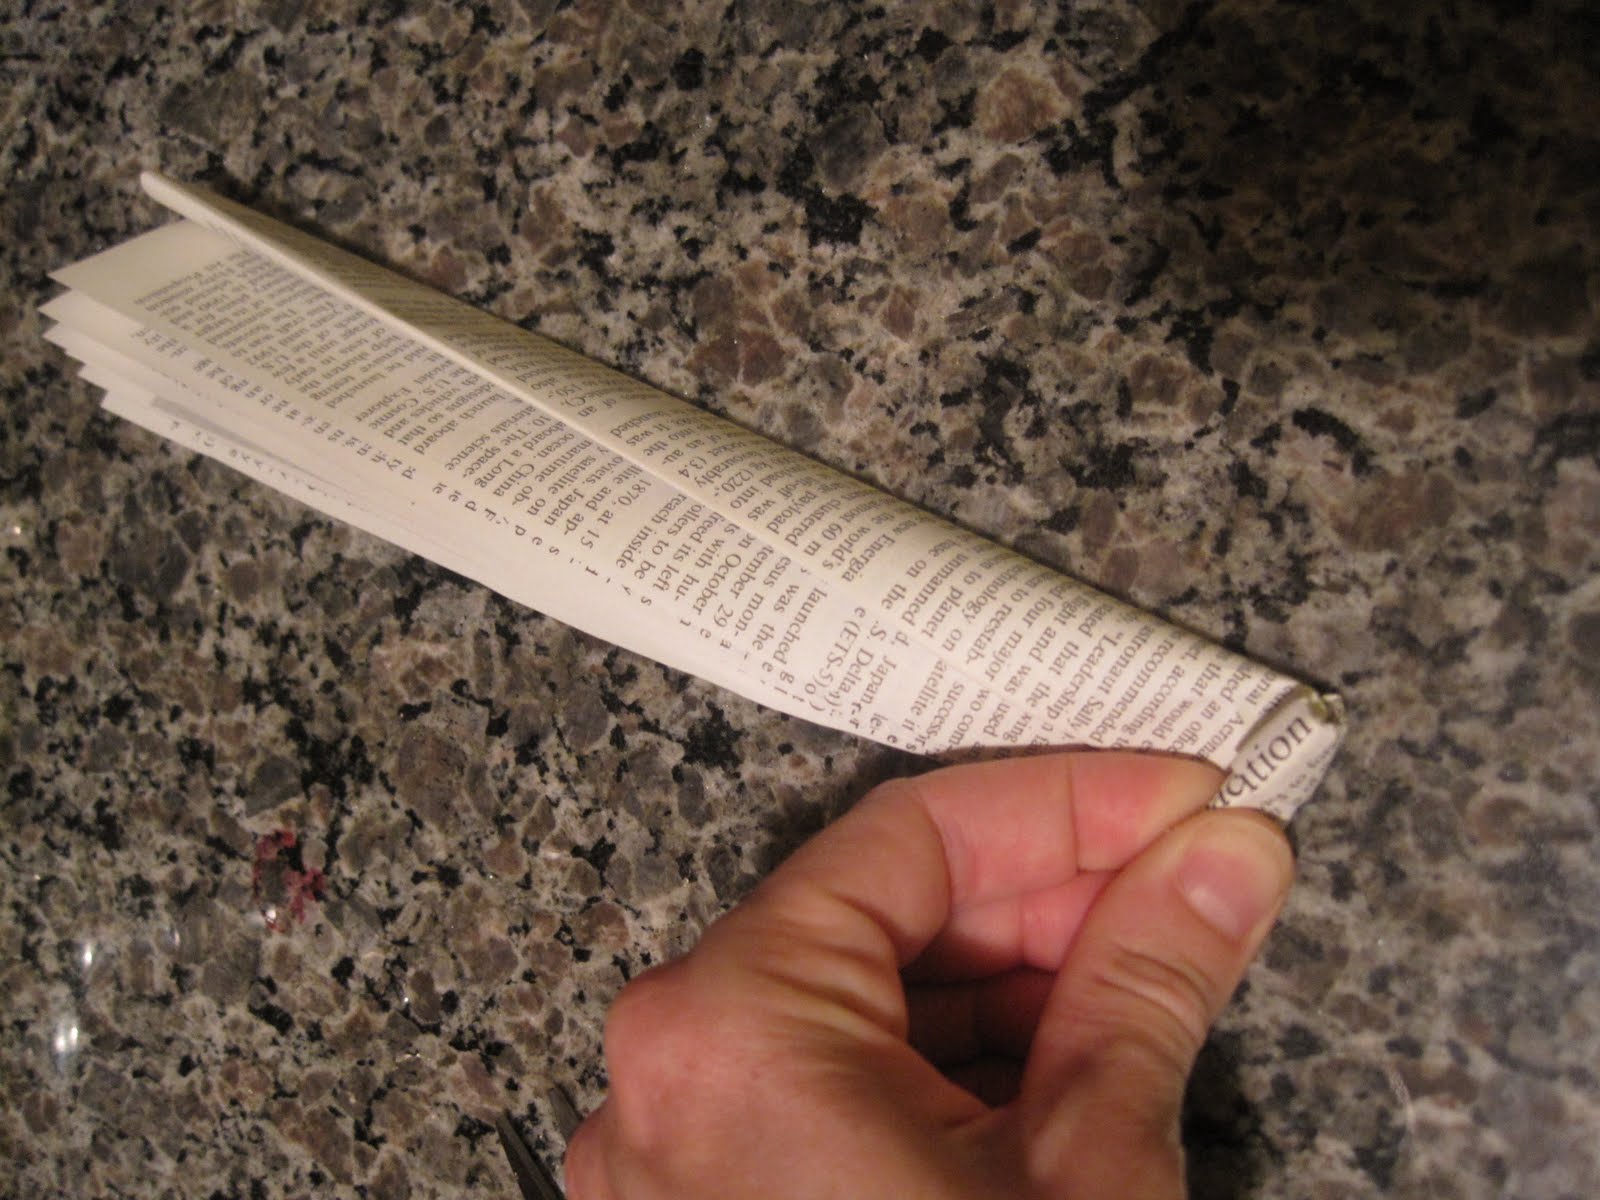
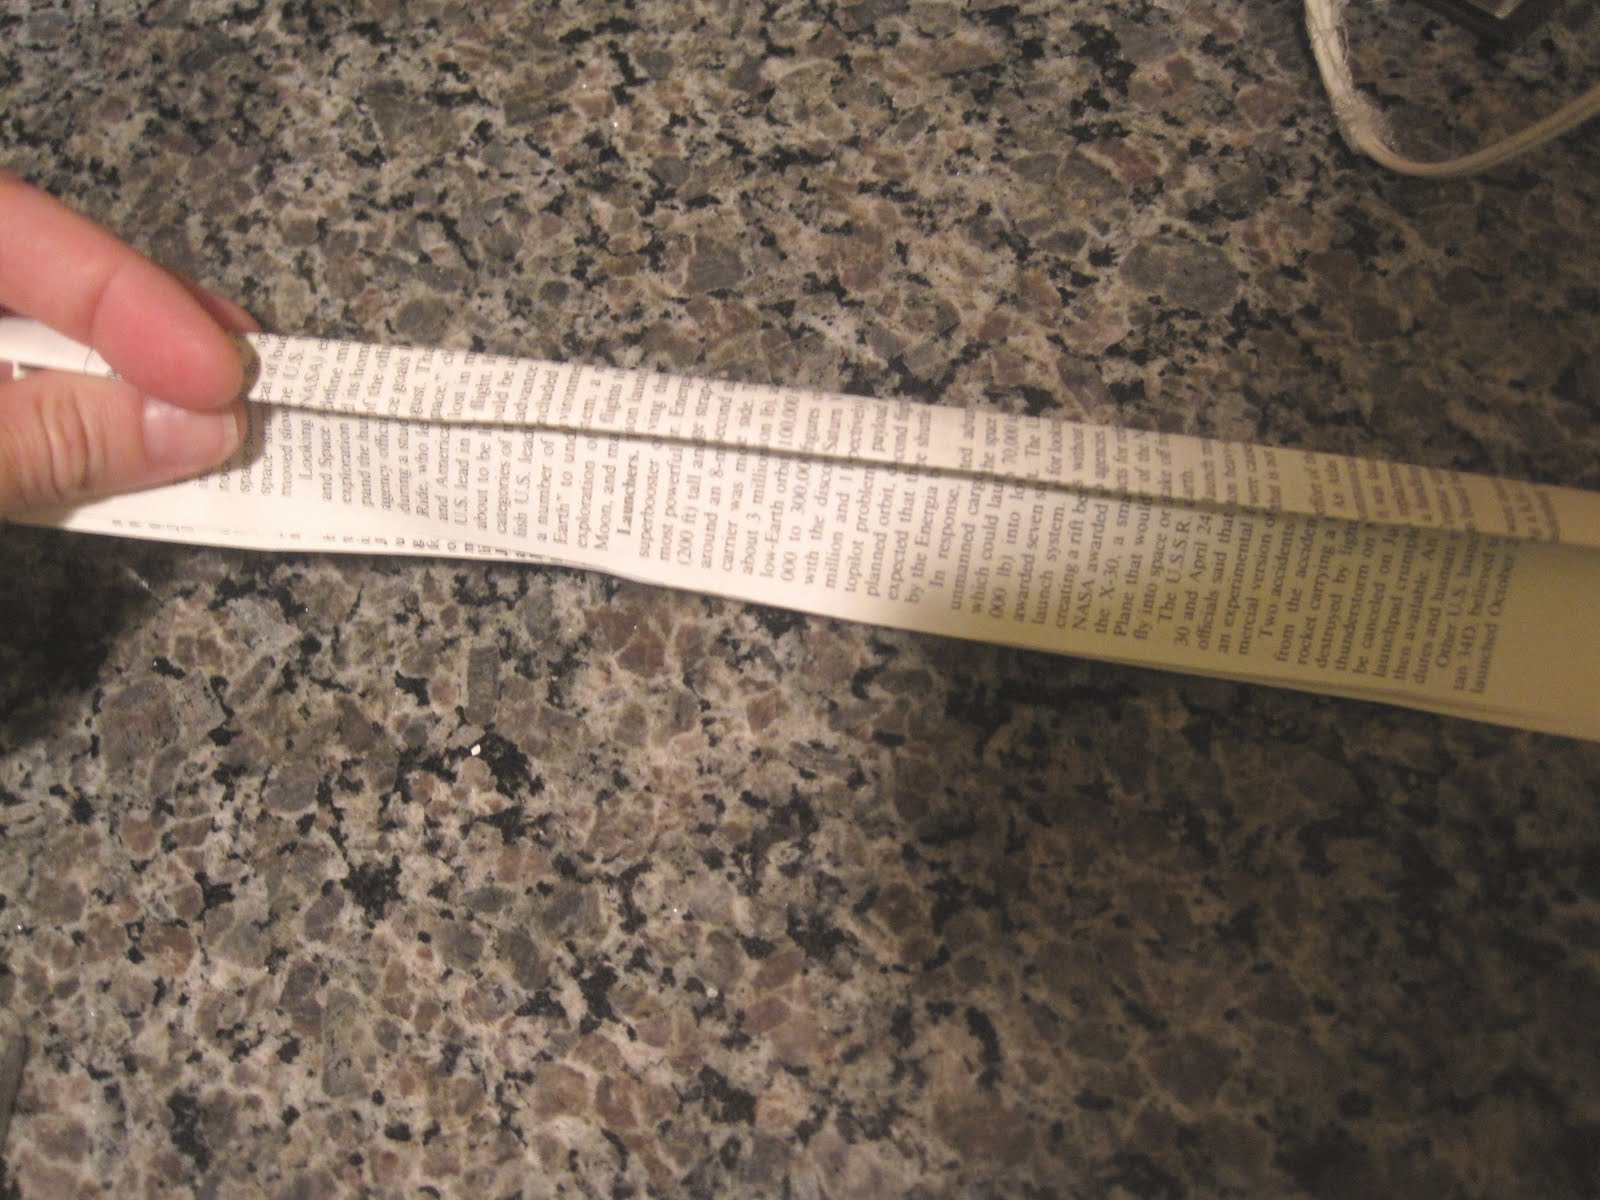
I chose to make my folds like this: First I fold three sheets in half to minimize the width.

Then in half again.

Then I make a small fold on one edge so that this can be molded as I go into the petals turning outward for a little more realistic dimension than a flat roll of paper. But this us up to you.

Then beginning at one end you have to tightly begin the roll.
You want this part to be tight so you don’t end up with a rose that has a hole down the center.

I use a method of making an extra small fold and then start rolling and pushing the paper down hard as I go to keep the roll tight, soften the paper folds, and keep its shape.
You don’t need to secure them at this stage unless you will be putting off the gluing stage for more than a day, in which case I suggest wrapping each one with a small rubber band.

! Have a Fabulous Day ! – Jenny at Dapperhouse