Creating a sensory bin is so fun because you are making something wonderful for your child to be excited about!
It is also Perfect because you can tailor it specifically to your child’s learning needs!
This bin is not created for your child to learn the color green but rather to stimulate and hold your child’s attention with a monochromatic theme so that learning can take place!
DIY GREEN Sensory Box
You have many fillers to choose from to use in your box:
green shredded paper or Easter Grass
dried split peas
green vegetable pasta
dyed rice . . .
I like to hand dye my own at home and mix it with white so there is contrast for the items!
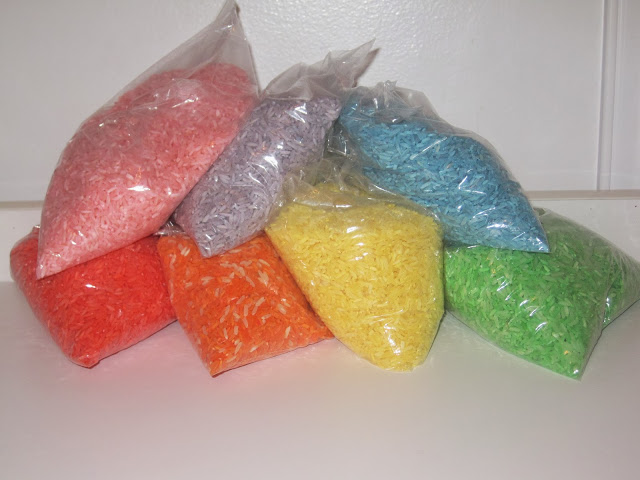
But you certainly don’t have to use green as your filler,
so the backdrop could be whatever neutral color you want such as; sand, beans, pasta, oatmeal, rock, cornmeal . . .
TIP : I like to mix sensory fillers so that there is more to explore, and because bigger fillers
such as shredded paper, can be easily separated from smaller ones such as rice!
Once you have decided on your filler you are now ready for your items!
Try to get a collection of natural items like;
rocks, wood, fabric, twigs, pine cones, shells, leaves, grass, seeds . . .
TIP : You can color wash natural items such as wood, rock and shells to make the colors you need.
Get something to scoop with (spoon) and something to scoop into and our (cup).
If you can, get tongs for pincer strength while sorting small objects.
Add small lids of various sizes and ice cube trays to sort and hold small objects.
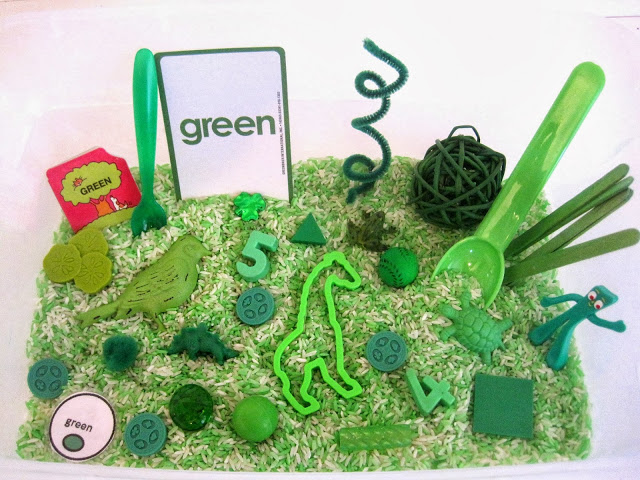
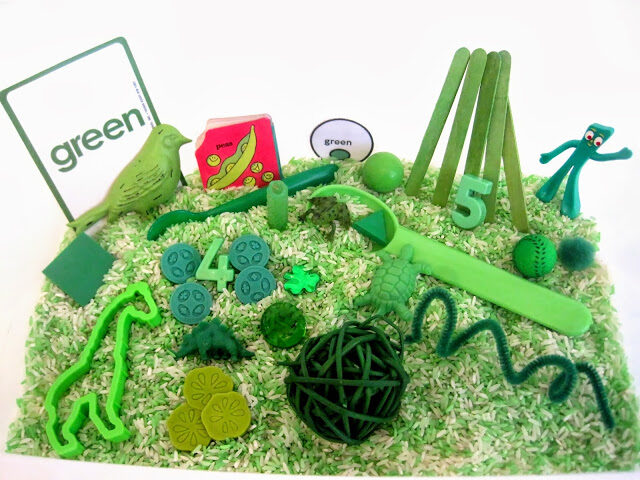
Now, add the GREEN items.
The secret is to get multiple items with various textures, shapes, sizes and amounts.
You want your child to be able to find and create patters (big, bigger, biggest, for example)
and have the sensory box sustain their attention.
You can get found items from around the house, like in the “junk” drawer and at the bottom of the toy chest.
You can go to second hand stores and find little objects (usually in bags of mismatched stuff).
You can get colored items at the party and craft stores too!
You can paint objects that are a different color with paint.
Flash Cards, Letter Tiles, Magnetic Numbers and other learning materials are fantastic.
Cookie cutters are fantastic because they encourage children to crunch down into the filler and experiment with making shapes, using pressure and more!
Use scented items or spices in small jars (lime, green apple, fresh cut grass, pickles, herbs) that are associated with the color.
TIP : to tailor the experience to your child, you can paint numbers, shapes, letters and words on wood blocks or rocks!
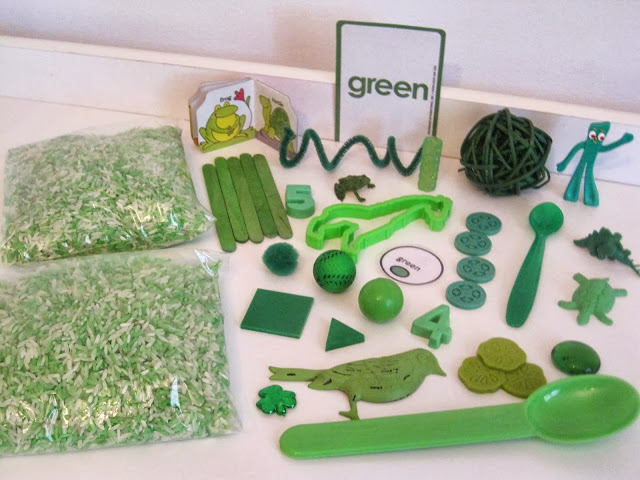
TIP : Keep your items and fillers separated in plastic bags or containers, then you can use one big bin / tub for your various themes and mix and match items and fillers as you create new ones!