Natural Branch and Cloth Curtain for a Small Window

Supplies:
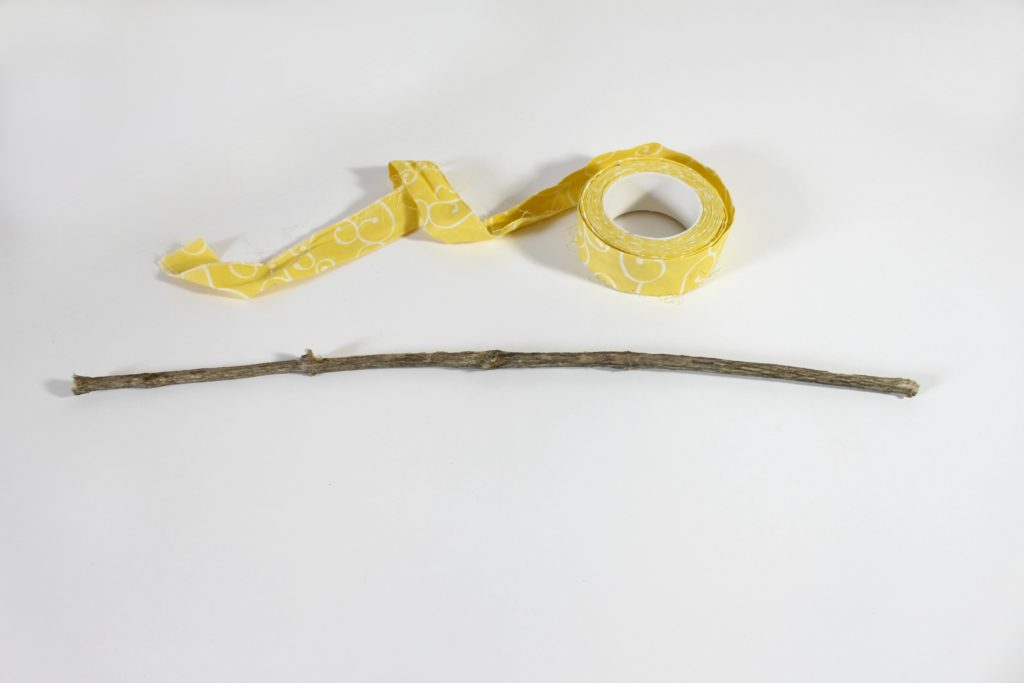
- A sturdy branch that is an appropriate thickness and length for the size of the window.
- A roll (or rolls) of cloth strips (I used 12 yards)
- Utility knife
- Scissors
- Measuring tape
- Glue gun
Instructions:
Step 1. Measure the branch so that it fits inside the window. Use the utility knife to cut it to size but making it 1/16” smaller than the exact measurement.
Step 2. Measure the length of the window from where the branch will be, to the bottom of the window. Then add 2”. Cut your strips this long. As you cut your strips, lay them along the branch spacing them anywhere from 1” – 3” apart. Cut the cloth strips until you have enough to fill the ranch (as shown).

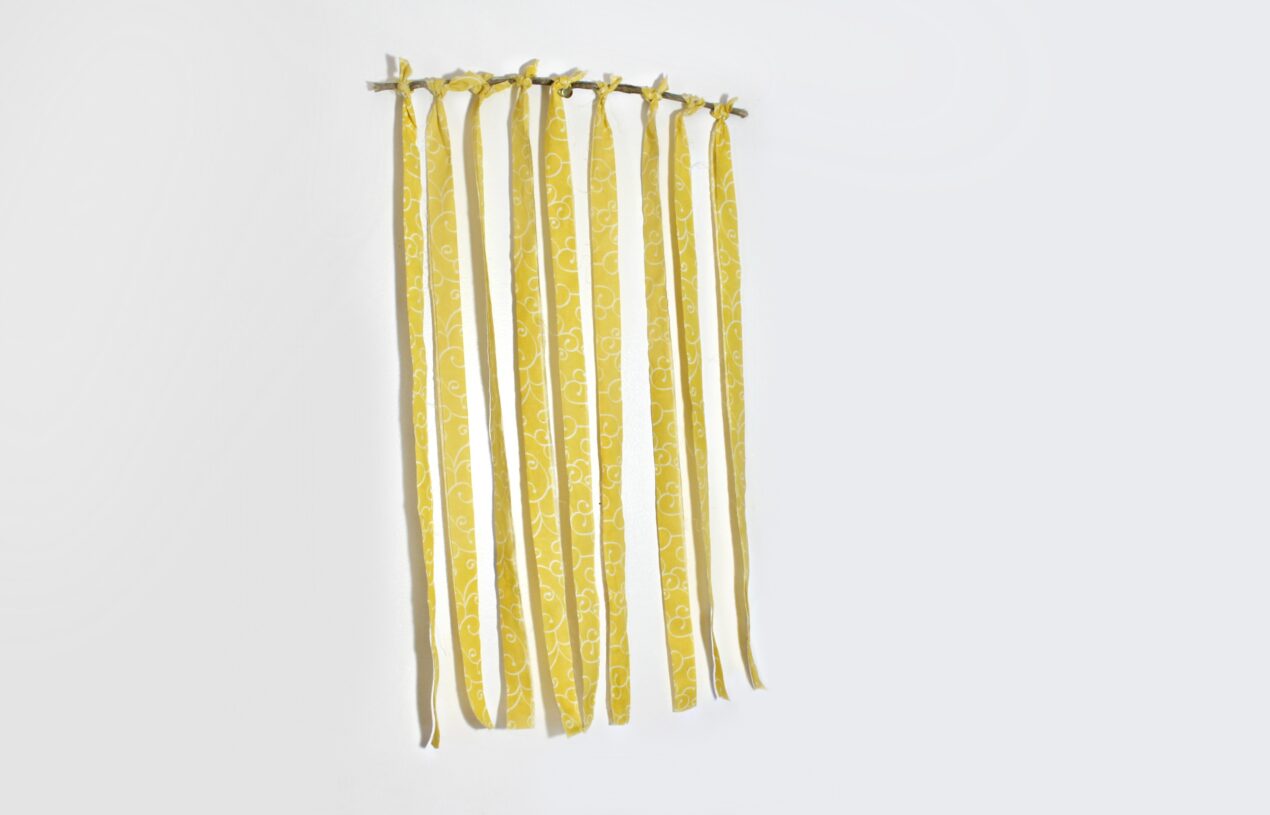
Step 3. Begin on each end from the outside tying the pieces of cloth in small knots. Try to use the same amount of fabric to tie each knot so that they look even at both the top and the bottom.
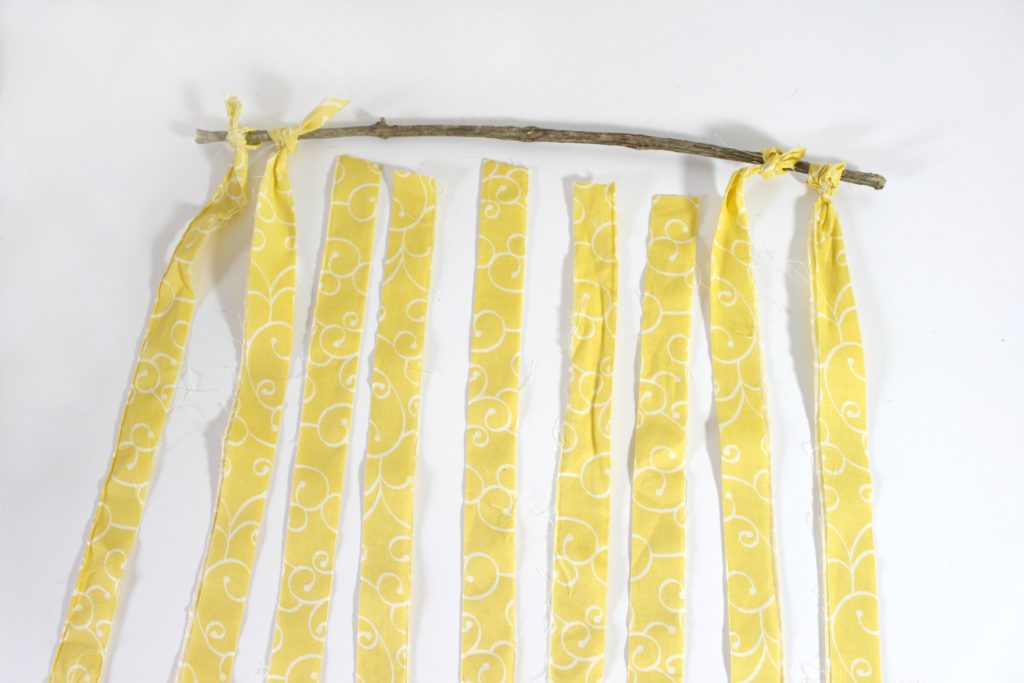
Step 4. Continue working your way into the center of the branch.

Step 5. Use the glue gun to add a bit of glue to each end of the branch. This will create a way for the curtain to attach and stay hanging to the inside of the window. Add more or trim on the edge of the branches until it fits snugly in the window.
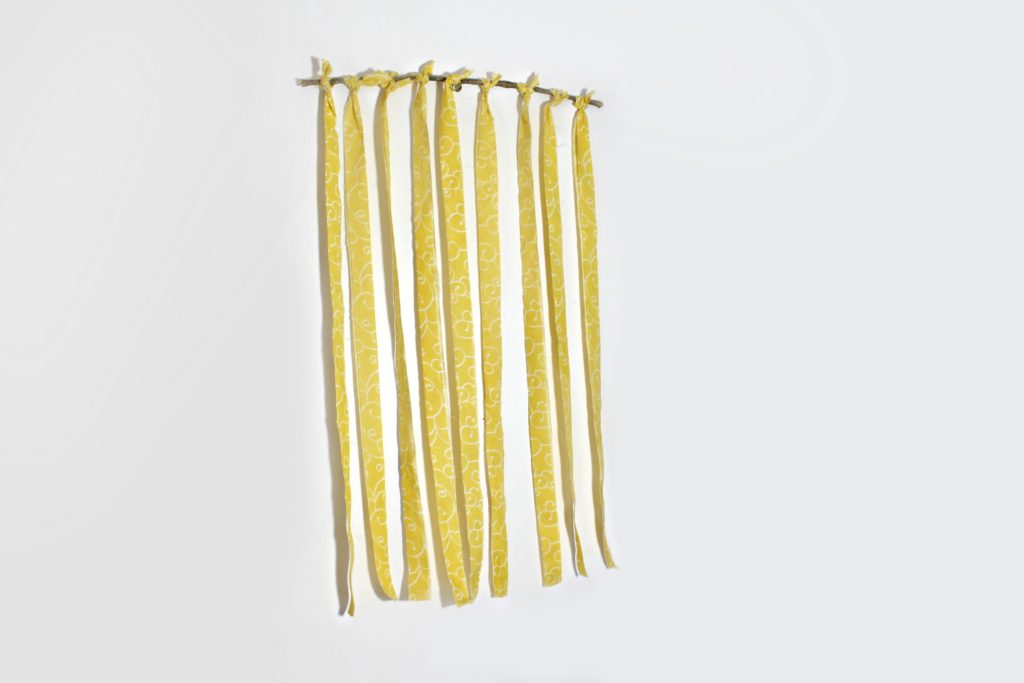
Step 6. Hang the curtain in the window and trim the bottom of any of the cloth pieces that may be too long.
Pin this for later. . .