I was in charge of my son’s class winter party this year. We only had 45 minutes to do crafts, snacks and games so it had to be timed perfectly. I decided that the kids should not do a craft that involved glue because there was not time enough for it to dry. The mom in charge of the other 4th grade classroom party was doing fleece scarves so I stole, wait I mean borrowed, her idea!! We have 30 children in the class so I bought 8 yards of fleece – 1 yard each of coordinating different patterns and colors. **One yard of fleece makes 4 scarves with 4 strips therefore you could get 1/2 yard of 2 coordinating patterns to make 4 scarves.
Here is how to assemble this DIY project.
Keep the fleece folded in half as it comes off the bolt from the fabric store.
Measure 7 inches across for each scarf.

The measurements of the folded fabric will be 7 inches by approximately 2 1/2 feet.

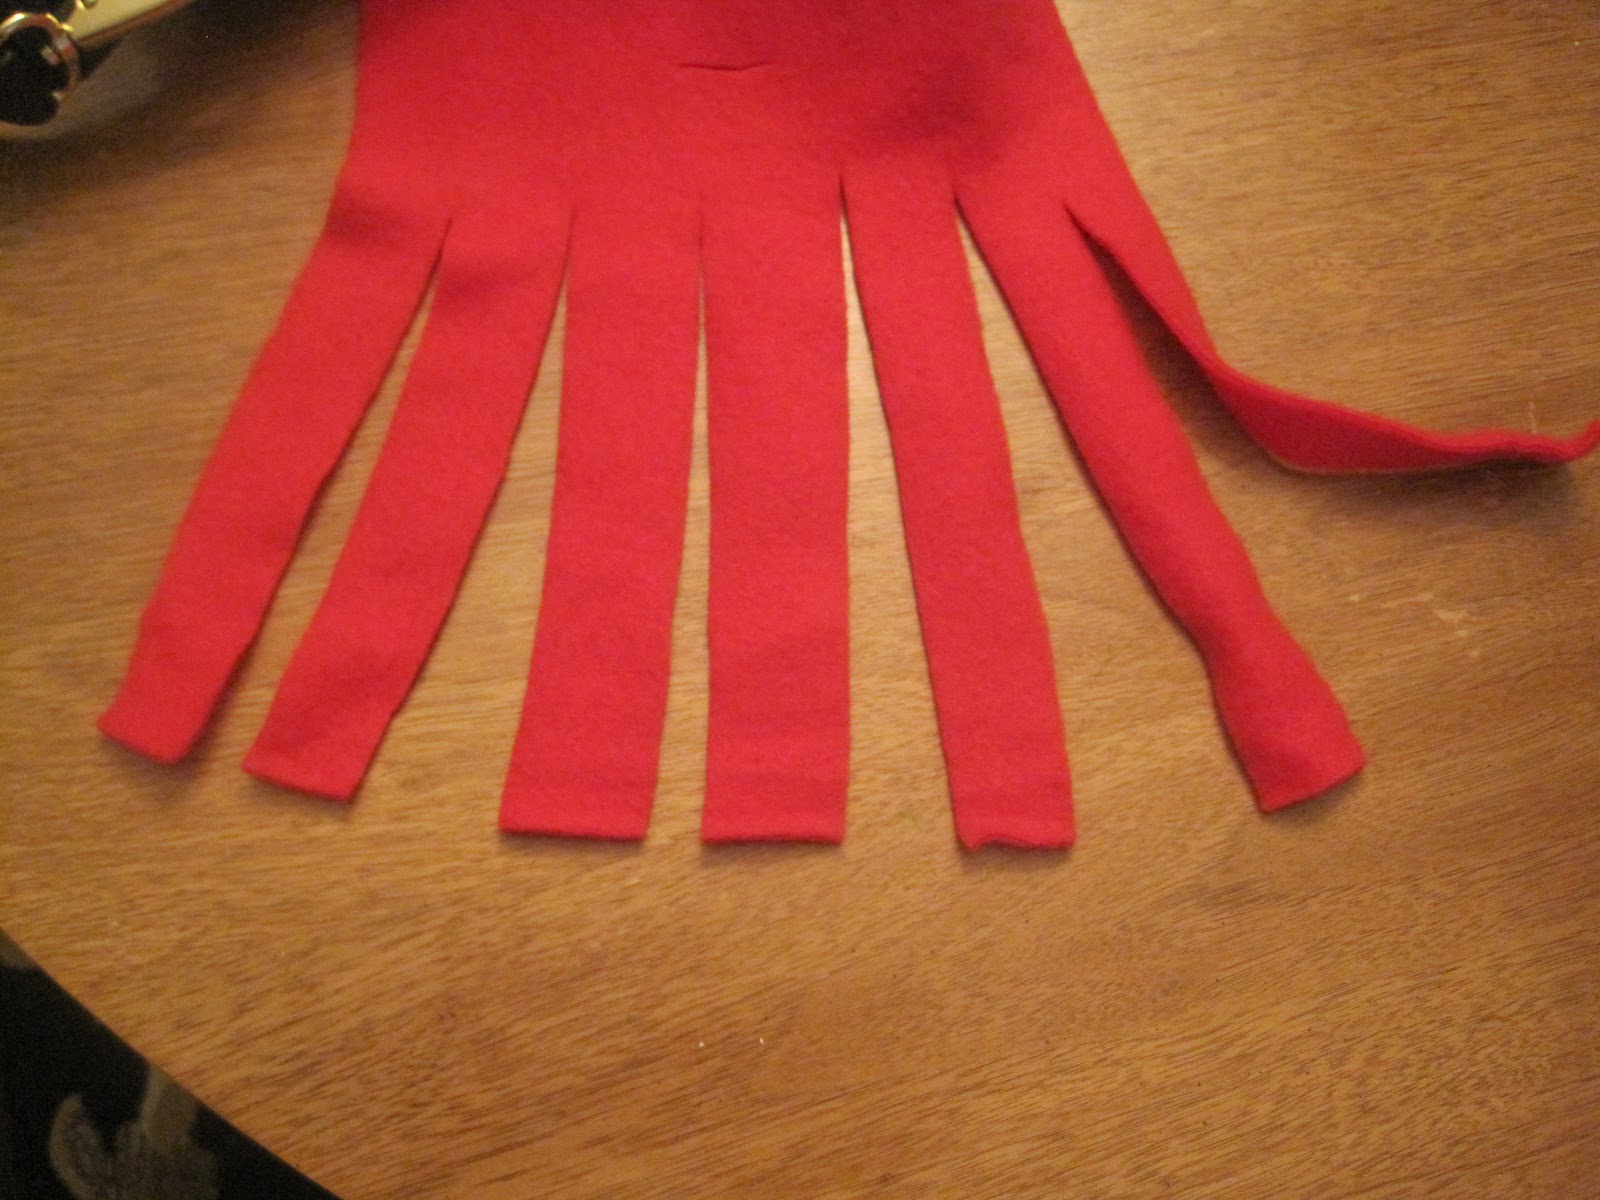
Cut out the scarves and then cut strips the same size about an inch and a half wide. (Here are my 30)

With the fleece still folded, measure and cut an odd number of strips at the end. . . about 9 works well.
The cuts/strips/fringe should be about 5-6 inches long. I still have to make cuts on this one.
Fold the fabric in half lengthwise so that you can make cuts down the center of the scarf. Start by making cuts about 2 inches from the start of the fringe, then about every 3 or 4 inches up the center of the scarf.

Be careful to make the holes only about 1 inch wide meaning a 1/2 inch cut on the folded center. Any wider than this and the contrasting strip down the middle will not stay put and not look nice.

When the cuts are done give the scarf and strip of fleece to your child.
Let them thread the strip through the holes.

Once the piece is woven through every hole you can choose to flatten out the scarf or bunch it up a little making sure that the ends are pulled evenly on each end.

Have your child divide the fringe so that the center fringe and the woven strip are together in the center.
Tie these together in a tight double not at the top where the cuts end.
Then begin with the outside strips and tie two together in double knots until every string is tied.

The string in the center will be stretched longer than the others so trim it to match the length of the fringe.
You are done!

The kids LOVED this craft and I have seen them in the neighborhood wearing the scarves proudly! The thing that I dont love about this craft is that it takes a lot of time to set up and prepare but not much time to assemble, but the kids really love it and it is a useful craft too! Another other variation of this craft is to cut the holes to thread the strip on either side of the center and closer to the edge of the scarf. Then weave two strips on each side of the scarf instead of just the middle. Taking your children to pick out the fleece may be the most fun part because there are A TON of designs and colors from popular cartoons, to sport teams to every conceivable print and design. Have fun indoors and stay warm outside with your new scarves!
Looking for another Easy and Fun DIY Scarf Tutorial?
Hobbies on a Budget has a great post on a beautiful Ruffle Yarn Scarf.


Hobbies on a Budget
You know me! I love these! Guess what I’ll be trying soon! 🙂 Fun!
Jennifer Williams
Even I can do this one, thank you!!!!
Angela Paris
This is so cute! Love this idea 🙂
Angela Paris
This is so cute! Love this idea 🙂
Amanda @ Survival Guide by The Working Mom
I am so NOT crafty but this looks really easy to do and simple as well!
Cheap Is The *New* Classy
I have to admit…I kind of had my doubts about how this would look in the end {thought I LOVE fleece} but I REALLY want that plaid scarf!!! It looks great!
Dawn
Isabella_Grey
These are too cute! My mom actually taught me how to do the ruffle scarves over this Christmas visit.
Mom Blog
This is an awesome project for kids! My boys would have a blast doing this. I need to find some camouflage fleece:)
Thanks for sharing,
Bobbie Anne
MikiHope
Other then the fact that it takes a lot of prep work (I applaud you!!) I can well imagine that the kids would love this and will wear them proudly!!
Meghan @ Crazy Casa K
Looks great! and easy 🙂 What a cute kid you have there 🙂
Karen Hartzell (@InTheKitchenKP)
My daughter did scarves for her holiday party too how cute! Her class did slip knots through holes at the ends to make the fringes. Perfect for short time and learning crafters. Happy 2013 Jenny!
All You Need for a Snowman Story Read Aloud & Photos | jennyatdapperhouse.com
[…] hat from the thrift store and a scarf that we made . . […]